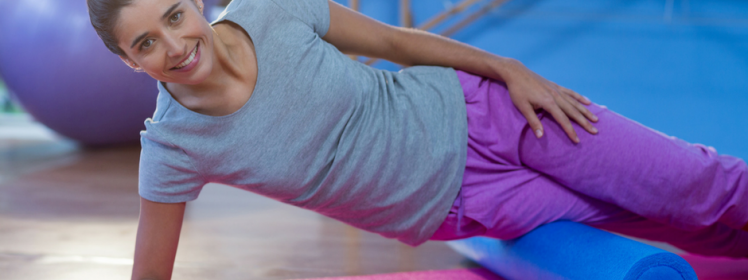
Foam Rolling, also known as Self Myofascial Release (SMR), is a stretching technique used in the fitness industry that provides a wide range of benefits. Whether you are a fitness enthusiast or professional athlete, the body develops patterns of movement that can inhibit range of motion, cause overactive muscles, and even cause pain. By using a foam roller before and after exercise, these muscular patterns can be corrected by loosening the tissue that surrounds the muscle, also known as myofascial tissue. When this tissue is massaged by using the roller, the muscles respond, resulting in increased range of motion, muscle recovery and if present, reduced or eliminated pain.
WHAT IS FOAM ROLLING AND HOW DO I START DOING IT?
WHAT IS FOAM ROLLING AND HOW DO I START DOING IT?

In the beginning, getting comfortable with the pressure caused by using the roller can take some time, so it’s best to keep things simple. Some positions can cause discomfort, as the tissues may be tight from adhesions (knots) that are in the muscle and have been tight for a length of time. Modify as needed, and be sure to listen to your body.
Things to Remember:
- As you go through each position, do the following:
- Look for any spots that might be tender, tight or uncomfortable.
- When you find a spot, pause, and focus on that spot.
- Keep rolling on it until the tissue starts to loosen, or until discomfort lessens by 75%.
- If a particular position is causing pain that is not manageable, modify.
Piriformis (Gluteal Region)
Sit on the foam roller, crossing the ankle at the knee. Place the hand on the floor to support the body, and begin rolling forward and back through the glute muscle. Roll through the muscle, applying moderate pressure. Repeat on both sides.
Hamstring (Back Upper Leg)
Sitting on the roller, bend one knee to stabilize the body. Sitting up tall, roll back with the hips until the sit bones are behind the roller. Reach for the toe of the straight leg with the opposite hand. If the toe can’t be reached, use a towel or yoga strap to wrap around the foot. Keep the back straight by squeezing the shoulder blades together and engaging the core. Roll backward through the hip, focusing on loosening the hamstring muscle. Repeat on the other side when finished with the first.
Illiotibial Band (IT Band – Outside Thigh to Hip to Shin)
Lying on your side, place the roller on the side of the thigh, just under the hip bone. For stability, bend the top leg over the bottom one, and support the body on the forearm. Begin rolling through the leg starting at the top of the thigh, all the way down to the knee. Be sure to walk the arm out to adjust, and use the top leg to take pressure off the bottom as needed. Repeat on the opposite side.
Quadricep (Front Upper Leg)
Lie front side down on the roller, placing it at the top of the thighs. This technique can be done with two legs or one. If using two legs, simply bear crawl forward on the forearms, making sure to engage the core by drawing the naval toward the spine. If using one leg, cross the leg over at the ankle, and support the body with one hand and one forearm. Roll forward and back through the quadriceps until they feel a release of tension.
Calves
Place the foam roller under the calf muscles. Like the quadricep technique, the calves can be rolled either with two legs or one leg at a time. Using the arms to support the body, lift the hips off the ground and begin rolling from the top of the calves down toward the bottom of the calves. Change angles to roll the inside and the outsides of the calves, making sure to pay attention to the areas with most tension.
Erector Spinae (Back)
Begin by sitting on the floor with both knees bent. Place the roller in the small of the back and lean back to rest the body on one forearm. Lift the hips in a bridge and gently the muscles that are along the spine, between the ribs and the hip bones. Repeat on the other side when ready.
Rhomboids (Upper Back)
Place the roller under the shoulder blades and support the head with both hands. Lift the hips off the ground and roll the body backward until the roller meets the end of the shoulder blades. Roll back to start position until the roller meets the top of the shoulders. Relax into the position to release any tension between the shoulders, keeping the chin gently tucked.
Latissimus Dorsi (Center Back)
Lying on the side, place the roller under the backside of the armpit. Straighten the arm out, and guide the roller with the other hand. The body doesn’t need to lift off the ground entirely for this technique as the range of motion is small to begin. Roll up and down along the smaller part of the lat, looking for tension at different angles. Repeat on the other side.
Pectorals (Chest)
Lying front side down, place the roller under the front side of the shoulder, into the pectoral muscle. Support the body with the other forearm and begin rolling side to side, looking for adhesions in the muscle. When tension is found, pause and focus on the tension until it eases. Repeat on the other side.
How Often Should I Foam Roll?
To reap the benefits of foam rolling, it is best to take the time to learn the techniques properly. Foam roll before exercising to loosen the body and free it from any tightness that may inhibit proper alignment and muscular function. Foam rolling can be done post workout as well to help with muscle recovery. To maintain any benefits gained from foam rolling, consistency is key. Three days a week is a great place to start until the body adjusts and begins to respond positively. Once the body is ready, foam rolling can be done on a daily basis.


